How To: Restore Window Jambs

how to restore window jambs
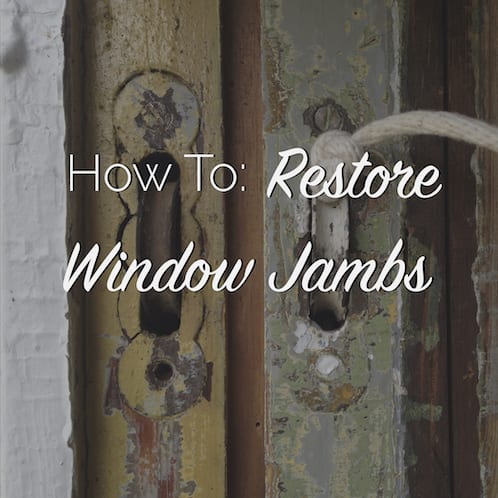
It may seem like a daunting task to restore your own windows, but I’m here to tell you that just ain’t the case. If you’ve got two thumbs, then you can scrape paint and that is the hardest part of any window restoration project. Learning how to restore window jambs, while the most physically demanding part of any window restoration project, is the least technically difficult.

I could write out all kinds of instructions for you on the topic like I used to do before the days of video streaming on the internet, but today I figure a video is the best way to show how to restore window jambs since a picture is worth a thousand words and video, well, that’s worth a thousand pictures so you do the math!

I will give you guys the materials and basic steps below so you have the right order of operations, which is immensely important. This post will also contain a primer video that shows you removal of the sash and all the mechanical work involved in a jamb restoration. I tend to think of the mechanicals as a separate item, that’s why I’ve broken them out into the other video.

Getting Started

The first step is getting the sash out so the jamb is exposed and ready for restoration, you’ve gotta pull the parting bead and stops off to ready for the repairs you need to make. Sure you can leave them in, but it often makes it easier. The video below will show you exactly how to get the sash out and also covers the mechanical elements of the window like ropes and pulleys. Check this video out to get you started and prepped to begin your jamb restoration.

Restoring Window Jambs

Okay, the sash are out and your jambs are ready and waiting for you. What on earth are you supposed to do to get these jambs ready for those beautifully restored sash you’re going to put back in them? First, you’re going to need some supplies to make sure you are setup for success. Below is the list of everything I use in my jamb restorations.

Supplies

Once you’re stocked up with supplies, you need to prepare your work area for some lead safe work so that you don’t end up dying an early death or killing those around you. It’s not as scary as it sounds. Check out this post to get the 411 on how to do it right. How To: Lead Safe Work Practices

Step 1 Paint Removal

Grab your scraper and take all that excess paint off of the jambs. This built up paint makes it extremely difficult for the sashes to slide smoothly, so removal really is necessary. You don’t have to go all the way to bare wood, but the build up definitely needs to be brought back down.

Step 2 Repair

You may have larger repairs that require some more complex carpentry which happens from time to time, but usually it’s nothing a little epoxy can’t take a care of. I’m a big Abatron fan, so I use their epoxies listed above. Clean out the loose wood, apply your LiquidWood, then fill the voids with WoodEpox. If you’re nervous about using epoxy, don’t worry, the Abatron system is extremely simple and I’ve got a detailed post on doing these epoxy repairs right here.

Step 3 Sand

Can’t leave everything rough and ugly, so I give everything a good sanding with an 80-grit paper to make sure it’s all smooth. Then clean off the surfaces with a tack cloth or damp rag and you’re ready for the next step.

Step 4 Prime & Paint

Put on a solid coat of primer and once that is dry, finish the jambs with a good enamel paint. It doesn’t matter if it’s oil-based or water-based, as long as you’re using a paint with a hard finish that’s meant for exterior conditions.

Below is the video to show you those 4 simple steps in action. While the video below is only 2 minutes, the whole process takes a couple hours of work, not counting drying times, so, do plan accordingly. It can easily be done in phases if your schedule requires.

That’s it! You’re now ready to restore the jambs and mechanicals of almost any double-hung window with both of these videos in hand. If you’re planning on tackling this yourself be sure to pick up a copy of my book Old Windows In-Depth that covers everything from A-Z about restoring your windows. It’s the perfect companion for anyone looking to restore wood windows.

The post How To: Restore Window Jambs appeared first on The Craftsman Blog.

Source: https://thecraftsmanblog.com/how-to-restore-window-jambs/

Is Foam Insulation Worth it?

is foam insulation worth it
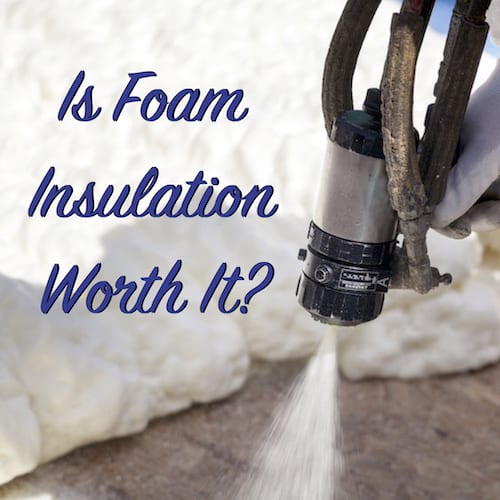
It gets cold outside in the winter but that doesn’t mean it has to be cold inside your house. Using the right kind of insulation in the right way is the key to staying warm and safe indoors. I recently talked about the Pitfalls of Old House Insulation and I’ve written about a variety of different types of insulation including blown-in, spray foam, and mineral wool, but today I want to focus on foam insulation.

Foam insulation can come in a few different forms, the most popular of which is spray foam, but there is also foam board insulation (often called rigid foam insulation). In this post, I’ll give you a break down of all three types and when and where they work best. These are all fine types of foam insulation, but don’t be fooled that they all work in every situation. When poorly matched to your application, some of these can pose major problems.

Spray Foam Insulation

In the last 20 years, spray foam insulation’s popularity has grown immensely and for good reason. It has a very high R-value per inch when compared to other insulations like fiberglass, mineral wool, and blown-in insulations. This high R-value, coupled with an ability to provide excellent air sealing helps a lot of contractors who specialize in new construction meets the more stringent air sealing requirements of the building codes today.

Open-Cell Spray Foam

  • R-Value: 3.5 per inch
  • Cost $1 to $1.25 per SF

The most affordable of the spray foam options, open-cell spray foam, is used in many applications like roof, walls, and ceilings. Open-cell foam insulation expands greatly upon installation and is fairly soft to the touch, unlike closed-cell foam. Open-cell foam is also vapor permeable which means it does not count as a vapor barrier and needs to have one applied over it. The vapor permeability of open-cell spray foam means that it can take in water and hold it, which can be a real danger. In the case of leaks, open-cell foam will absorb water and hold it against the framing and sheathing elements facilitating mold and rot.

Bottom Line: It’s a great and affordable insulation option when there is no chance of water intrusion, but you’re rolling the dice if you think it might get wet.

Closed-Cell Spray Foam

  • R-value: 6.5 per inch
  • Cost $2 to $3 per SF

Closed-cell spray foam is the king of the insulations when it comes to both R-value per inch and cost. Nothing else comes close, really. Unlike its open-cell cousin, closed-cell spray foam is not vapor permeable and will not hold water. This makes it an excellent option in case of water intrusion. It also includes binders and glues in many applications that help it to literally glue a structure together. Its strength can help prevent uplift when applied on roof decks and provide shear strength to structures. One downside is that often the blowing agents for closed-cell foam are hydrofluorocarbons, which are not so good for mother nature.

Bottom Line: It’s expensive, but wow, will this get you a structurally sound and well insulated building.

My personal preference on spray-foam insulations is that for new construction, they are an excellent option (if applied correctly, since user error during installation can cause catastrophic results. Learn more here). On historic buildings and remodels, I’m not a fan because the design of older homes especially historic in nature was never meant for this type of insulation and can cause performance problems.

Spray foam is NOT reversible, which is a major problem in historic buildings, which may cause irrevocable damage to historic fabric.

Rigid Foam Insulation

rigid foam insulationNot all foam insulation is spray foam. Rigid foam insulation is another option for insulation that should be considered, especially since unlike spray foam, it is easily reversible, a major plus for historic structures. Rigid foam insulation come in several varieties and of course, there are different makers of each type.

All of these rigid foam insulation options are usually sold in 4×8 sheets of varying thickness from 1/2″ to 2″ so you can pick and choose the best option for your house.

Expanded Polystyrene (EPS)

  • R-value: 3.8 per inch
  • Cost: $.26 to $.32 per SF

Expanded polystyrene (EPS), often known as Styrofoam, has been popular for years. It does just as well at insulating coffee cups as it does old houses. While it may have the lowest R-value of the rigid foam options, it does also follow with the lowest cost of any we’ve mentioned so far. There have been newer High-Density EPS products that have managed to bump up the R-value and excel in exterior applications.

Extruded Polystyrene (XPS)

  • R-value: 5 per inch
  • Cost: $.38 to $.45 per SF

Extruded polystyrene (XPS) rigid foam is usually blue or pink in color and is not quite as rigid as the other foam insulations, which gives it a little more versatility, in my opinion. XPS has no problems with absorbing water, unlike polyiso, which is another mark on the plus column for XPS. It typically does not come faced with foil like the other two types of rigid foam mentioned here.

Polyisocyanurate

  • R-value: 6.8 per inch
  • Cost: $.65 to $.75 per SF

Polyisocyanurate (polyiso for short) has the highest R-value and (no surprise) correspondingly the highest cost for any rigid insulation. Its R-value does have a tendency to degrade over time with exposure. Typically sold with a radiant barrier of foil on both sides, you also get the benefit of stopping radiant heat with this foam. Read about radiant heat transfer here! Polyiso is essentially the board form of the closed-cell spray we talked about in the first section.

Rigid foam insulation is not something you cut and stuff into the stud bays like fiberglass or mineral wool. Rigid foam insulation is best installed on the exterior of the framing and then the siding is installed over top of it. This may be particularly difficult and expensive for retrofit installations.

Installation on roof decks as a part of a re-roof project often makes the most sense and provides the biggest payback. If you’re going to add 2″ to the height of your roof by decking with rigid foam prior to installing new shingles, you’ll need to make some modifications to the cornice and fascia, but this can be done in ways that don’t impact the overall appearance of the house too much.

Conclusions

It’s really for you to make up your mind as to if foam insulation is right for you, and if so, which type and where. I know, I know, lots of question and not as many answers. My hope is that armed with the information here, you can make a better decision when it does come time to insulate your house. Happy insulating and stay comfy!

The post Is Foam Insulation Worth it? appeared first on The Craftsman Blog.

Source: https://thecraftsmanblog.com/is-foam-insulation-worth-it/

The Pitfalls of Old Home Insulation

the pitfalls of old home insulation
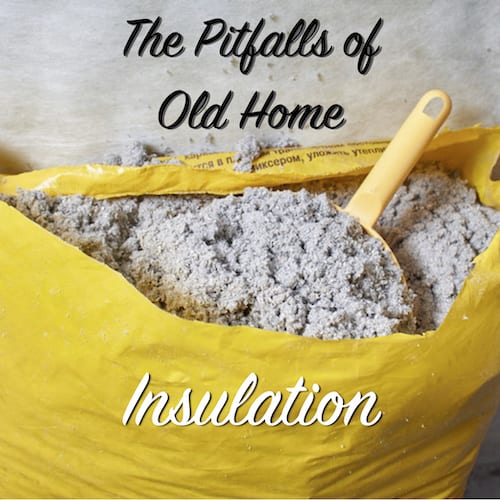
Old home insulation is a controversial topic among old house owners and restorers. What are the right materials to add and where can I use them? Will it cause unforeseen problems down the line? There are lots of questions and it seems fewer answers than needed, so, with this post, I hope to provide some much needed answers.

Insulation keeps you warm in the winter and cool in the summer. It makes our homes more comfortable than they would be without it, and whether you’re using something like mineral wool, blow-in, or good old fashioned fiberglass batts, adding insulation will surely improve the energy performance of any house.

So, you should add it to your old house as soon as possible, right? Not so fast. Used to be I was someone who promoted the retrofitting of just about any old house with new insulation, but looking back, that was naive of me. There are certain times (and places) where adding insulation will be immensely valuable and other times when it can prove catastrophic. So, you certainly need to know what you are doing before you take on the task of insulating an old house.

The Problems With Old Home Insulation

I’m not really talking about the problems with existing old home insulation, but rather the topic of how and where should you add insulation to an old home. Homes built before the mid-20th century were not built with the same techniques that we use today.

These older homes were largely built without insulation and just open cavities in the walls where the house could breathe. Builder’s knew that water was the #1 enemy of any house and the way they built may have allowed water to get into the walls in minute amounts, but due to the extraordinary looseness in the building envelope, the house could always dry out safely and quickly.

Then a few decades later, we come by and stuff those cavities full of fiberglass which acts like a sponge and we wonder why our old house is having so many problems. Adding insulation where it was never designed to go (mainly the walls of an old house) causes a host of problems all due to the moisture issues it creates. Here are just a few of the highlights.

Wood Rot

Wood can wet without issue, but keep it wet and then the problems arise. Anywhere that water gets trapped causes wood moisture levels to rise and once they get above 20% to 30% those are ideal conditions for wood rot. Installing any kind of insulation in an area that gets wet with any regularity will almost inevitably lead to wood rot even if you follow my tips to prevent it. You have to remove the continuous source of the water.

Peeling Paint

When paint is peeling down to bare wood, you may think it was a shoddy paint job, but the cause is usually moisture related. Once again, the moisture gets into the wall assembly and gets absorbed by the insulation where it sits like a dirty sponge soaking into the wood. When excess moisture builds up in the wood, it will try to escape through the wood surface and push the paint right off. Wondering where you have moisture issues? Look for the peeling paint and you’ll be in the right spot.

Mold

Black, green, brown, it really doesn’t matter what color it is, nobody wants it in their house for the health hazards it poses. What does mold need to thrive? Warmth, oxygen, wood, and (you guessed it!) moisture. Ever hear about the mold outbreaks in the dessert? I didn’t think so. Dry houses are happy houses. Wet houses…not so happy. Want help getting rid of mold? Check out this post.

How to Insulate an Old Home?

Let’s start with the basics. I’ll show you where to insulate and where to leave it alone. I understand that you may disagree with me about the risk vs. payback when I tell you to NOT insulate an area, but trust me, I have your best interests at heart. I have seen insulation go sideways too often to not share what I have learn from my years in the industry.

Start in the Attic

The attic should always be the first place you add insulation whether you live in Florida or Fargo. It doesn’t matter the climate, just start with the safest place that provides the biggest bang for your buck and that is always the attic. I’ll say that one more time. ALWAYS the attic! I hope I wasn’t unclear.

How do you insulate the attic safely to avoid problems? Well, the attic floor is a great place to start because even if there is a roof leak there is air flow between the roof and the attic floor that allows things to dry out and avoid the problems we talked about earlier. Blown-in insulation is a great option here so check out this how to post about installing it yourself.

Stay away from the underside of the roof if you have an older roof or especially a wood shingle roof which is designed to get wet and needs to breathe to dry properly. If you have recently had your roof replaced and have adequate waterproofing, underlayment, and flashing applied, then I usually agree that insulating the underside of the roof is then an option as long as you keep a diligent eye on your roof to make sure it stays in good repair.

Leave the Walls Alone

Don’t insulate your walls. What?? But it’s cold? I know and it pains me to say this, but the number one danger area that causes problems with old house insulation is your walls. Wood siding is usually not replaced every couple decades like shingle roofs. It likely has the same 100 year old kraft paper behind it that provides virtually no water proofing support.

There are a couple creative yet expensive ways I would consider retroactively insulating the walls of an old house if you are in a far northern climate where it might make financial sense. For anyone living below the Mason Dixon line it is never worth the expense to retrofit an old house with wall insulation.

One situation where it is okay to insulate the walls is if you remove all the siding and apply a new housewrap and then go over that with a rain screen before reinstalling your old siding. This may seem like a massive undertaking and it is. Full energy retrofits like this are expensive, but it really is the only safe way.

If you end up adding insulation without doing a full retrofit then you run the risk of developing Sick Building Syndrome (SBS) which saw a major spike in the 1970s after the energy crisis motivated people to stuff their walls with insulation indiscriminately.

What About the Crawlspace?

Insulating under floors is a great way to keep warm with very little potential issues. Sure it’s dirty and difficult to do, but you wont run into issues like with the walls. My preferred material for crawlspace insulation is Mineral Wool since it’s not rodent friendly.

Installing Mineral Wool between the floor joists takes a lot of work due to all the plumbing and electrical penetrations but it is very effective. Using a material like fiberglass batts works nearly as well, but fiberglass is a favorite nesting place for critters in the winter so I prefer Mineral Wool which is far less hospitable.

The Bottom Line

Now you know. Start in the attic, leave the walls alone, and attack the crawlspace if you’re up for it. There are lots of other ways to increase your energy efficiency that don’t have to do with insulation like caulking trim and baseboards which are notoriously drafty, weatherstripping doors and windows, adding storm windows, and even using thick drapes. These are all very effective at keeping your old house warmer and that is the name of the game.

The post The Pitfalls of Old Home Insulation appeared first on The Craftsman Blog.

Source: https://thecraftsmanblog.com/the-pitfalls-of-old-home-insulation/

Another House, Another Reno – A Few Updates…

kitchen dining room knockthrough

No, I haven't won the lottery and bagged myself a holiday home by the sea (although I wish I had!), I'm of course referring to Grants parents house, where we've been working and DIYing recently.

If you haven't been keeping up with progress over on Instagram, do come and join me! I'm much quicker at Instagramin' than I am blogging, so you'll see live-updates on there. I'm a little behind with blogging, so I thought it was about time I updated you all with the progress…

Read more »
Source: http://www.kezzabeth.co.uk/2019/01/another-house-another-renovation.html

Plaster & Window Workshop

historic homes workshopA special midweek post this week because I’m going to be teaching at the Historic Homes Workshop with some of my favorite preservation friends February 8-10 in Brooksville, FL. If you’re sick of the winter weather why not spend a few days with me in the Florida sun learning how to restore old windows and plaster?

The workshop is organized every year by the grand window nerd himself, Steve Quillian of Wood Window Makeover, and is a staple of my annual workshop schedule because it’s just so much stinkin’ fun! Friday is the kick off party followed by a day of classes on Saturday about a huge variety of topics, then Sunday caps the whole thing off by working alongside professionals as we volunteer our time restoring a local historic landmark. Learning, practicing, and giving back to the community, that’s what preservation is all about, right?

The week after the main workshop is reserved for more in-depth window related courses taught by Steve where you can learn sash making and how to start your own window business.

I’ll be teaching about plaster repair on Saturday and then using Big Wally’s Plaster Magic and Patching Plaster we’ll be repairing an entire room of crumbling 1860s plaster. That will be tons of fun and a rare opportunity to learn hands-on how to deal with the challenge of plaster repair in an old house. I really hope you’ll join me and comment below if you can make it!

Learn more and register by visiting Steve’s website at ArtisanArmy.com

Here’s the schedule details below:

Historic Homes Workshop  February 8-10

  • Friday, February 8, 2019       6:00 p.m. – 9:00 p.m.   Workshop Welcome Opening Ceremonies
  • Saturday, February 9, 2019   9:00 a.m. – 8:00 p.m.   Lectures, demonstrations and presentation from leaders in the historic preservation industry
  • Sunday, February 10, 2019      9:00 a.m. – 6:00 p.m.   Hands on Workshop – Pro’s and Joe’s, Introduction to Window Restoration

Artisan Workshop Series February 11-15

  • Monday through Friday 9:00 am – 4:00 pm
  • Total Window Makeover Course with Joe Hayes OR
  • Sash Maker Course with Steve Quillian

The post Plaster & Window Workshop appeared first on The Craftsman Blog.

Source: https://thecraftsmanblog.com/plaster-window-workshop/

5 Home Projects With a Huge ROI

5 home projects with a huge ROISome home projects provide more value than others and some can provide a huge Return on Investment (ROI) when compared to the rest of the pack. Sometimes that payback is in the form of added value for a potential sale and other times the financial boon comes from reduced energy costs that keep racking up month after month.

Every year I check Remodeling Magazine’s Cost vs Value Report to see what the trends are and get a sense of what projects give you the biggest bank for your remodeling buck. As a historic restorationist I take it with a grain of salt because I’m not prone to ripping things out and replacing them just because some magazine thinks it’s great idea.

My view on getting a big ROI on your home project is to check the report and rather than doing their prescription of “trash and replace” I aim to restore or fix up the parts of the house that they say provide the biggest ROI. That way you get the improved value and don’t contribute perfectly sound building materials to the landfill.

1. Front Door

This is the only part of your house that visitors will stand and stare at with nothing to do. If the paint on your door is chipping and ugly then that will be their first impression and you never get a second chance to make a good first impression. If you have a beautiful historic wood front door something as minor as a fresh coat of paint on the exterior can go miles to upping the curb appeal of your home.

According to Barbara Corcoran (the real estate mogul of Shark Tank fame), “Buyers decide in the first eight seconds of seeing a home if they’re interested in buying it.” How that front door looks plays a big part in that first eight seconds. If you plan to sell your house, sprucing up your front door should be one of the first things you do, after you pick up the dirty underwear in the hall of course.

Check out this post for some great front door options you can do!

2. Attic Insulation

This one has nothing to do with selling your house, but I’m sure some buyers would appreciate the added insulation. According to the Department of Energy the vast majority of heat loss is in your attic especially through the roof.

Adding a DIY-friendly insulation like blown-in insulation to your attic can be done on a Saturday and cost as little as $500 for a smaller house. The savings can quickly add up when you get your utility bill each month. Couple that will extending the life of your HVAC system which no longer has to work so hard to heat or cool your house and you get a double whammy to support that bank account.


3. Minor Kitchen Remodel

According to the cost vs value report a minor kitchen remodel returns approximately 81% of the cost you sink, but that number can go up significantly if you’ve got an ugly kitchen like I do. Minor improvements that don’t cost much could include some new appliances, repainting or refacing cabinets and adding new hardware, adding a tile backsplash, a new sink and faucet, upgraded counter tops, and give everything a fresh coat of paint.

In general, minor room remodels payback faster than a major “gut and rebuild” remodel does. So, if ROI is your goal for resale, then go with the scaled down remodel and make it look great for less up front cost. The same applies to bathrooms, which came in just a little less than the kitchen ROI.

4. Garage Door

Keeping with the stats from Remodeling magazine sprucing up your garage door is the #1 highest paying ROI home project you can do. Honestly, when reading this I was surprised and I think this largely applies to suburbia where the garage is a way more important element than on older homes where the garage is tucked into the back of the lot.

Whatever the case, if you have a garage that will be used on a daily basis, you definitely want to focus your remodel dollars here. Take that rickety old aluminum garage door and replace it with something incredible. If you’ve got your original wood carriage doors, this is not your excuse to replace them. Restore them and put them back into service for cheaper than a new modern door and you’ll gain even more impressive returns.

5. Deck Addition

Putting a deck on the back of your home, especially a wood one, adds tremendous value to your home as well as usability. Notice I said a wood deck? That’s because according to the cost vs value report a wood deck adds more value than a composite deck. Why? Because composite decking has so many issues like being too hot to walk on in the summer when you want to use a deck! I won’t get into my issues with composite decking here but you can check out my previous post and video to see what the fuss is all about.

A simple wood deck made of durable rot-resistant wood is the way to go, and while you’re at it, think of some creative designs for the railings. Don’t go with the standard off-the-shelf options at the home store. Design your own railing and crush the ROIs of other people.

I hope these five ideas have given you a good sense of ways you can garner some big returns on your home projects. There’s nothing better than making an improvement to your house and getting some dinero in your pocket because you made a wise decision. What home projects do you have in mind to tackle this year?

The post 5 Home Projects With a Huge ROI appeared first on The Craftsman Blog.

Source: https://thecraftsmanblog.com/5-home-projects-with-a-huge-roi/

Why “Green” is Dead

why green is deadThe green movement swept across the country more than a decade ago promising to change the way we thought about things like energy efficiency, recycling, waste, and the environment as a whole. And while it brought it us some environmental awareness as a society, it’s my opinion that in 2019 we can officially write its obituary.

Back in 2006, the whole country was awash in green products and television shows on HGTV and DIY Network. We were all cajoled into buying carbon offsets from companies like TerraPass. Even major manufacturers jumped on board and began creating “green” product lines in everything from household cleaners to T-shirts. The future was going was green and the skies would be filled with rainbows and butterflies.

I too felt the excitement of changing the world with green ideas. I even had a television show called The Green Life all about living a green life that was optioned by a production company, but sadly never came to fruition. Things didn’t exactly turn out the way we hoped. So, why was that? What happened?

The Causes of Death

The whole premise behind green products and a green lifestyle was to live in a way that did no harm (or at least less harm) to our planet and ecosystems. While I still see this as a noble goal, and one that can be attained by individuals, in 2019 I recognized that it will never happen in a way that will make a dent.

Cause #1 Replacement Mindset

America has taken the red pill and gone down the rabbit hole with Neo and Morpheus (pardon the Matrix reference) to an alternate worldview that we can no longer awaken from. We are now a culture with a replacement mindset, and a replacement mindset is the complete antithesis of green ideals.

We don’t fix things anymore. When they break, we throw them away and buy a new thing. Got a hole in your sock? Tell me the truth, do you sew it up or throw it away. If I’m being honest I’m talking to myself here too! We have access to so much stuff now at such low prices that repair is just not worth our time. Trash it and replace it.

We have applied this same principle to everything from socks to buildings. We tear down old buildings because…well, because they are old. Not because they are too far gone to save, but because we want something new. We have been so conditioned to think that newer is always better even though that is only occasionally a true statement.

The green movement cannot truly thrive in a country where we throw away so many perfectly good things, even if we replace them with organic, pesticide-free, sustainably grown, ring-spun cotton.

Cause #2 Green Washing

I’m fairly libertarian in my political views. Usually, I’m a live and let live kind of fellow, and in this case my libertarian stripes shine true because I believe strongly that freedom always trumps regulation even if this statement flies in the face of what I’m about to say. Corporate America destroyed green products.

The first products that came to market were truly green products. Companies like Tom’s of Maine and Whole Foods were doing green and good for the planet products before it was cool. Then the green wave hit America and every major manufacturer created a line of “green” products whose “greenness” was only label deep.

The public stopped trusting that what we were actually getting was a green, responsibly manufactured product that was actually good for the environment and largely went back to the old standard products our grandparents used. The idea of green products was diluted so far that all the taste had gone out of the movement.

Cause #3 The Recession Started…and Ended

We had a major financial meltdown in 2007 and 2008 right when the movement was picking up steam. As is understandable, people turned inward to focus on self preservation. The environment and more premium priced green products took a backseat while we all struggled to pay our bills.

Then in 2016 when the economy finally exploded again, it was go, go, go to make hay while the sun was shining. We were too busy working our tails off for more money that we got sloppy and wasteful, as is our nature. It seems like green just can’t catch a break.

So, where do we go from here? The world has changed a lot in this last decade. We seem to have moved on from the original green ideals to new things. Better things? Who knows, but from my vantage point, the final nail has been placed in the coffin of the green movement and the world is left to figure out where it wants to go from here.

The  Obituary

After a decade of poor health and abuse, our dear friend Green passed away peacefully in her sleep. Born in 2006, a once vibrant movement with hopeful proponents set to change the world, it wasn’t long before she was battered and abused on all sides by corporate mis-management, insane economics times, and a culture that never really understood her. 

She leaves behind a growing community of makers and DIYers that hope to one day carry on the ideals that she once so proudly stood for. Green is dead, long live Green.

The post Why “Green” is Dead appeared first on The Craftsman Blog.

Source: https://thecraftsmanblog.com/why-green-is-dead/

Is Finger Joint Lumber Worth It?

is finger joint lumber worth it
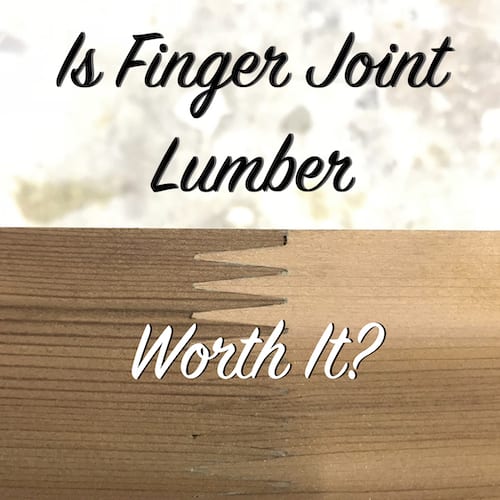
We all want cheaper lumber, right? Well, you may not want “cheap” lumber, but you certainly don’t want to pay any more for your materials than you have to. And that’s where finger joint lumber comes in. While it can save you a lot on your lumber and molding costs it may not be the best choice for your project.

Finger joint lumber was the lumber industry’s way of creating the long pieces of wood that we need for non-structural things like trim and casings. Sure you can buy non-finger joint versions which are usually called stain grade, but they cost a lot more than their finger jointed cousins. Why?

How is Finger Joint Lumber Made?

finger joint router bitWood manufacturers take some left over lengths of wood that are too short to use anywhere else and cut the ends of them with a finger joint profile. It’s not complicated, you can make your own finger joint profile with a finger joint router bit if you wanted to. It’s a great way to make a piece of wood extend to almost any length by adding more and more pieces to the end.

The finger joint is then glued with a wood glue or other adhesive and clamped together to cure. Once the glue is cured and the clamps are removed you can sand or plane the wood smooth so that the joint lines up perfectly and once painted the joint is usually invisible (for a time).

Finger joint lumber is cheap because the manufacturers can use small lengths of leftover wood to assemble full length of moldings. That equates to cost savings sure, but what does it do to the performance?

Finger Joint Performance

This is just my opinion from working around the stuff for years. Sometimes I’ve installed it myself, but more often I’m the one removing it when it fails. It can work well, in larger pieces when there is ample gluing surface to help hold the pieces together, but it still has one fatal flaw.

Wood moves. Wood expands and contracts in response to the conditions in the environment around it like heat, cold, and moisture. The problem with finger joint lumber is that every piece of wood moves differently and the piece of wood on one side of the joint vs. the other side will almost always expand and contract at different rates. This results in the joint weakening and pushing apart over time.

Even if there isn’t failure of the joint the expansion and contraction often results in the joint projecting through the paint where it can be clearly seen. Can you say, “ugly”?

Joints like in the picture at the top of this post tend to perform best because of the large glue area, but small finger joint moldings like door stop, cove molding, quarter round and other similar items often don’t even have the strength to survive transport from the store to the job site.

Should You Use Finger Joints?

I certainly won’t yell at you if you do. NOOOOOOOOOOOOO!!!! Just kidding! Finger joint lumber should never be used for anything structural or exposed to the elements, but if you want to save a little to put some new casings in your closet then sure go ahead. Just be aware that you get what you pay for and it is much cheaper than solid wood. What does that tell you about the quality you are getting?

My thinking is very much in line with what Benjamin Franklin famously said, “The bitterness of poor quality remains long after the sweetness of low price is forgotten.”

The post Is Finger Joint Lumber Worth It? appeared first on The Craftsman Blog.

Source: https://thecraftsmanblog.com/is-finger-joint-lumber-worth-it/

OSB vs. Plywood: Which is Better?

osb vs plywood which is betterWhat’s the difference in OSB vs. plywood? They are certainly two very similar items that are used in almost identical applications. The general public often calls plywood OSB and OSB plywood. So, what’s the difference, really? Is it like the difference between Coke and Pepsi or is it more serious than that?

While they can be used for the same purposes, there are significant differences between the two and I’ll show you what I’m talking about below. I’m not going to go into the almost infinite varieties of thickness since thickness is not a real concern here. Mostly what I want to focus on is the differences in construction and performance so that you’ll know when to use one over the other.

Since sheathing (what plywood or OSB are called when used on the exterior of a house) is rarely, if ever, seen again once you cover it up with siding or shingles, it’s important to choose the right materials for the job. Failure of the sheathing is extremely expensive since the everything attached to it needs to go as well. You want to make the right choice the first time.

What is OSB?

OSB is short for Oriented Strand Board. Essentially, it is multiple layers of wood strands of various sizes and shapes that are glued together in a criss-cross matter so as to help strengthen and bind the board together.

Since it is made of small pieces of wood rather than larger sheets like plywood or even more so like nominal lumber, it is much faster and cheaper to produce, which means using OSB is a sure fire way to keep costs down.

Early versions of OSB were called waferboard and this sub-standard version gave OSB a bad name initially, but much of the performance issues have been eliminated with improved technology and manufacturing process.

Today you can find OSB in thickness from 7/16″ to 1 1/8″ for different applications from roof, wall, subfloor, I-joists and everything between.

Advantages of OSB
  • More cost effective
  • 2x greater shear strength than similar sized plywood (Source: University of Massachusetts)
  • Meets most building codes for roof and wall sheathing
Disadvantages of OSB
  • Edge swelling is common when exposed to moisture
  • Sometimes made from wood species with poor rot resistance
  • Rough texture not appropriate for finish work
  • Provides minimal impact protection compared to plywood of equal thickness

What is Plywood?

Plywood is a sheet good commonly sold in 4×8 sheets consisting of multiple layers of veneer lumber bonded together with adhesives. Plywood is made with an odd number of layers for optimal strength and performance.

Up until 2000, plywood held the majority of the market for wall, roof, and floor sheathing when it was surpassed by OSB, which as of 2018, held about 75% of the market share.

One of the nice things about plywood is the variety of options you can buy. There are pressure treated grades, marine grades that can be used in water, fine hardwood options for finish work and cabinetry, pre-finished panels, or simple down and dirty 1/2″ CDX plywood. The bottom line is that there is a plywood for almost every application.

Advantages of Plywood
  • Huge variety of options for every application
  • Higher impact resistance compared to OSB (Source: FEMA)
  • Better performance in high moisture applications
Disadvantages of Plywood
  • More expensive than OSB (about 15% to 30% more)
  • Significantly lower shear strength than OSB (Source: University of Massachusetts)
  • Natural knots holes in inconsistent locations can cause soft spots

Which Should You Choose?

Well, how should I know? Seriously, it just depends on the application, so I’ll give you a couple ideas of which would work better in each application to get you rolling.

Sheathing

If you’re building a house, then I’m a fan of OSB for almost everything sheathing related. OSB is great for walls and roofs and for subfloors I’m particularly fond of an engineered wood panel similar to OSB called Advantech. The ZIPSystem is a great all-in-one OSB sheathing panel that has the building wrap already attached to it, so all you have to do it tape the seams.

One best practice for wall sheathing that I learned from Matt Risinger is to use pressure treated plywood as the lowest course of wall sheathing to help prevent rot, since that is the most prone to wetting.

Hurricane Protection

This isn’t a big deal for most of the country, but hurricane preparation is one place that you want to make sure do it right since your life may depend on it. When you are boarding up for a big storm, you should be using at minimum 1/2″ CDX plywood. OSB does not provide adequate protection against fast moving storm debris.

Work Surfaces

My go to option for cabinets boxes and work tables surfaces is 3/4″ birch plywood. It is super smooth and sturdy and makes for a great work surface or a strong cabinet carcass. You can use pre-finished birch plywood to avoid having to paint the interior of the boxes and save a ton of time.

Curved Projects

Sure you can bend nominal lumber if you want but building curved projects from multiple layers of 1/4″ finish plywood is a great way to get the job done inexpensively and quickly. I have built curved window jambs and other pieces of furniture by laminating 3 to 5 pieces of 1/4″ plywood together with my favorite wood glue.

Exposed Exterior Panels

For large flat surfaces wider than 12″ exposed to the weather like soffits, board and batten siding, or other decorative elements, there is really nothing better than marine grade plywood. Marine plywood is different from pressure treated plywood. It is not treated with chemicals to prevent rot, but rather, marine plywood is made with perfectly smooth layers and waterproof glue so that it can perform so well against water that you can build a boat from it!

Marine plywood still needs to be painted or finished with some sort of coating or it will not last because while the glue won’t fail, the wood fibers will be damaged by the elements.

There is a great video by Matt Risinger on the topic of OSB vs. plywood especially if you are comparing the two in regard to building and sheathing a house. You’ll get info about pricing and where to use which. Check it out below.

The post OSB vs. Plywood: Which is Better? appeared first on The Craftsman Blog.

Source: https://thecraftsmanblog.com/osb-vs-plywood-which-is-better/

What We Have Planned for 2019!

Renovations in 2019 what we have planned

2018 was pretty easy-going in terms of home renovating. We did a fair bit of work, don't get me wrong, but it was all casual with no single room being the focus of the year and no major destruction unfolded. Compared to 2016 and 2017 which included living without a kitchen for 18-months, the last year has been an actual BREEZE.

Well, 2019 is the year that will see us going back to the more hardcore days. 2019 is going to be JAM PACKED with DIY and home projects and there will definitely be chaos. So, here's what we have planned…

Read more »
Source: http://www.kezzabeth.co.uk/2019/01/what-we-have-planned-for-2019-renovations.html